Boogschutter
Photography Background Paper Ultimate Buying Guide
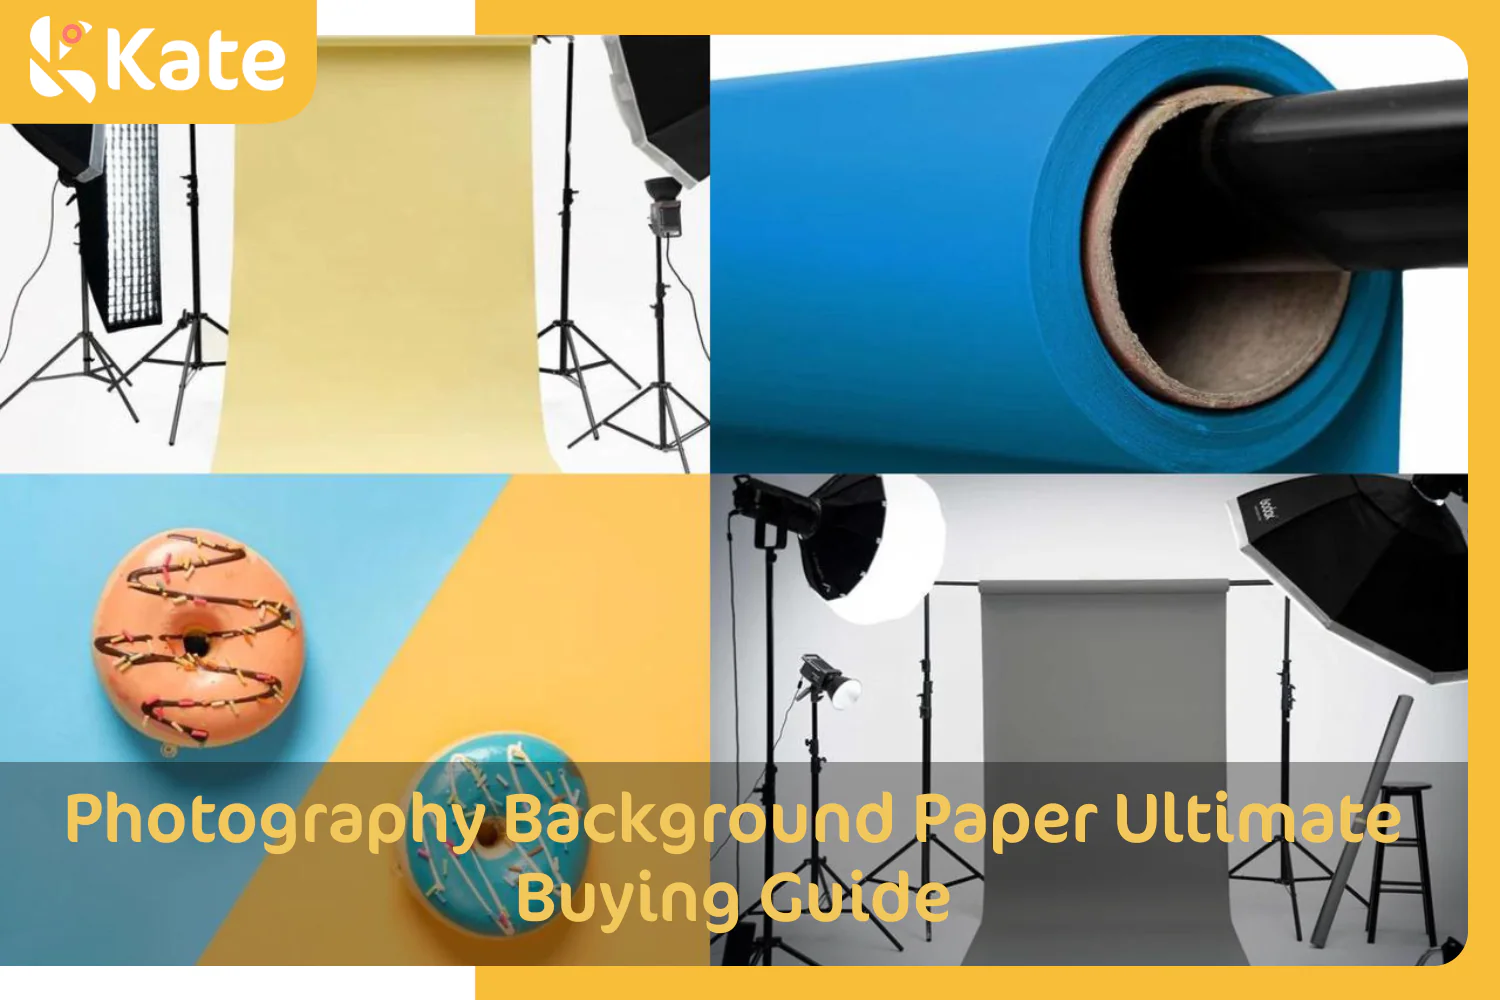
Photography background paper is also called backdrop paper. It is an essential tool for creating the perfect background for many types of photoshoots including portrait, newborn and product photography.
This guide to backdrop paper in photography includes tips on choosing the right background paper for your shoot including backdrop paper size and color. You’ll find tips on setting up a seamless paper backdrop, using them and storing unused rolls of backdrop paper. There are key post-processing tips for fixing issues such as blemishes, color and lighting problems.
What are Seamless Paper Backdrops?
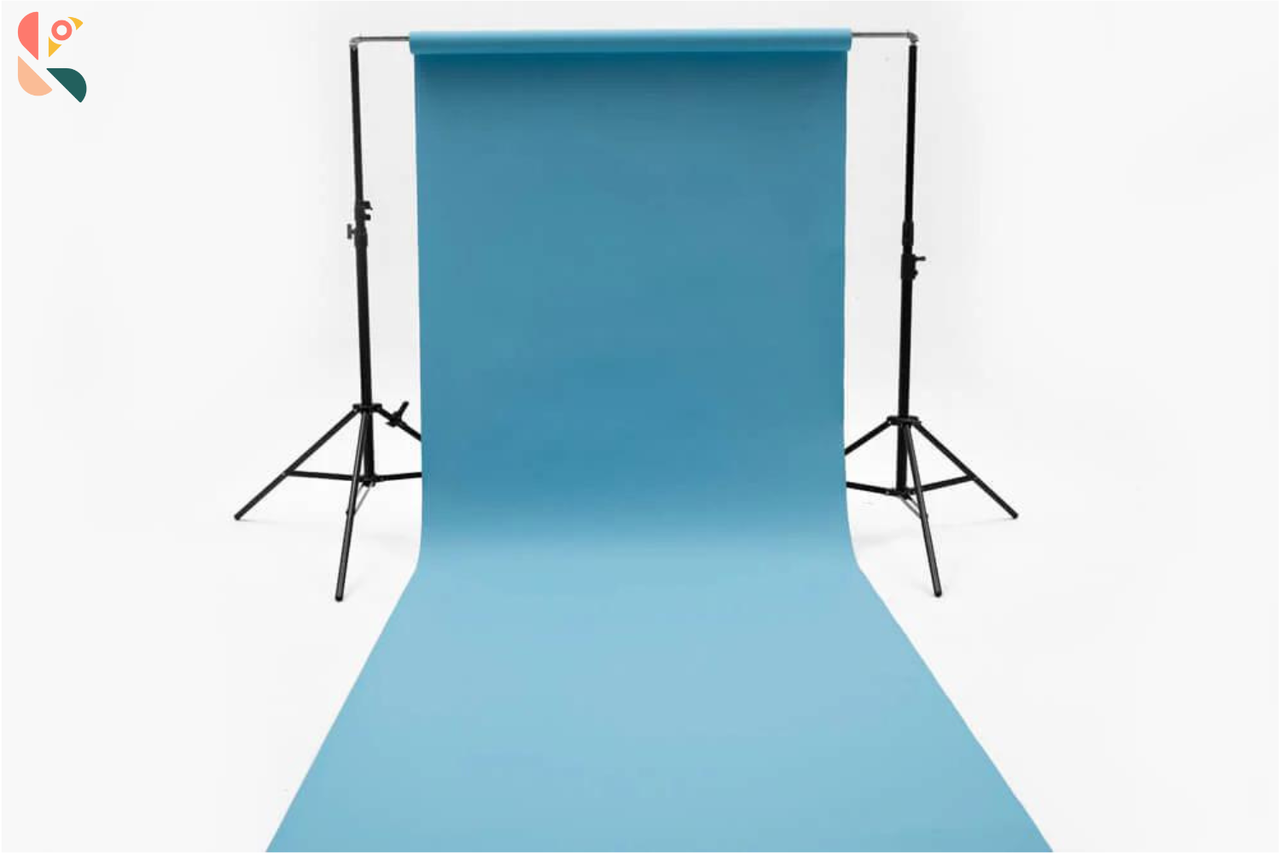
Seamless paper backdrops are long rolls of thick, non-reflective paper available in widths from around 4.5 to 9 feet, or 1.4 to 2.8 meters. These backdrops come in a spectrum of attractive colors and give the background of a photo shoot a clean, professional and uncluttered appearance.

Paper backdrop rolls have a thick cardboard tube or core inside to keep the paper in good condition. The tub is installed over the crossbar of a backdrop stand. Here’s the key to using backdrop paper: The paper is unrolled to cover both the wall and floor, the vertical and horizontal space. The paper isn’t creased where the wall meets the floor, but is curved instead, a technique producing an “infinity curve.” The result is a continuous backdrop that does not attract attention but instead highlights the subjects of the shoot along with any props that might be included.
Over time, if the paper becomes faded or damaged, that section can be removed, and a new section unrolled to produce a fresh, smooth backdrop. Lengths vary, but 33 feet or 10 meters is common, allowing for two complete backdrops per roll.
Backdrop paper is an essential element in photography types including portrait photography, product photography and other photography genres shot in a studio.
Pros and Cons of Seamless Background Paper
The pros of background paper start with it being seamless, providing a continuous background. It is non-reflective, so the finish won’t reflect light and produce glare. Backdrop paper is available in a range of colors, both light and dark and cool and warm, so a color can be chosen that best suits the subject’s skin tones or attire and the purpose of the shoot. The rolls of backdrop paper are affordable and often sold in sets, which makes it possible for even beginning photographers to have a variety of colors to offer their clients. These backgrounds are easy to set up, use, store, transport and change. Small imperfections like a crease or dirt smudge can be removed from photos in post-processing. Finally, most backdrop paper is ecofriendly – made with sustainability in mind and 100% recyclable.

In terms of disadvantages, the paper will eventually get dirty, wrinkled or torn, and a new section or roll will need to be used. In other words, durability is good but not great. Backdrop papers are mainly for indoor shoots, suitable for outdoors only in dry conditions.
Seamless Background Paper vs. Microfiber Backdrops
Microfiber backdrops are also available. There are advantages and disadvantages comparing seamless background paper to microfiber backdrops.
While microfiber backgrounds cost more than paper backdrops, they are more durable and last longer. However, they are heavier than paper backdrops, so moving and installing them may be more difficult.
A microfiber backdrop is more resistant to wrinkles and tears than paper, and dirt can be cleaned from a microfiber backdrop with gentle soap and water. In fact, some microfiber backdrops are washable.
A good range of colors is available, though because of the higher cost, most photographers start with seamless paper backdrops.
How to Choose a Paper Background for Your Photoshoot
Choosing the right paper background for your shoot is essential for producing images that fit your clients’ needs and make them happy with your completed work.
Selecting the best paper backdrop involves considering the right width backdrop paper for the number of subjects and their size.
Choosing a seamless backdrop paper color is something of an art and science. The color should be one that enhances the appearance of the subject, and you should understand how background color affects what you can do with the image in post-processing.
What Paper Backdrop Size Should I Order?
The simple answer is to order the widest backdrop paper size, because wide paper is the most versatile. However, to break it down more specifically, here are your width options and what size shoot they are best for.

Narrow backdrop paper is typically 53 inches or about 4.5 feet or 1.4 meters. This is a good width for a single child, adult or pet, a child and a pet or a parent holding a baby. It is used for headshots too.
Medium width backdrop paper is around 86” or about 7 feet or 2.2 meters. This paper backdrop size is right for full length portraits, a family photo with a baby, single person photo with props and themed or decorated photo shoots with a small number of subjects.
The widest backdrop paper is around 106 inches or almost 9 feet or 2.8 meters. This paper background size is ideal for family portraits or groups of 3-5 people, especially when the subjects are moving. This backdrop paper width is also used for shooting large products or a series of products.
Which Paper Backdrop Color Is Right for You?
Paper backdrop color selection is critical. For many shoots, the best background color is one that goes well with the subject’s skin tones or their attire, or if it’s a product shoot, complements the product’s colors.

However, there are specific reasons to choose certain paper backdrop colors. White is clean and unobtrusive and is used with key lights. Neutral colors like gray, off-white and beige are warmer and allow the subject to really stand out. Black projects a dark or moody vibe. The tone of any color can be brightened or darkened with different lighting and exposure settings.
Bright colors exude creativity and energy, but be careful that they don’t clash with clothing or product colors. And chroma green and blue backgrounds provide a uniform background that can be digitally replaced in post-processing chroma keying.
Photoshoot Scenarios for Using Paper Backdrops
The purpose of the photoshoot is another factor in determining the best backdrop paper to use.
A narrow or medium width backdrop paper is a good choice for family and individual portrait photoshoot, business headshots and portraits, and other commercial or corporate photos. If the family or group is large or if candid shots are taken as they move, then wide background paper is appropriate. Colors used for this purpose are typically neutrals such as off-white and gray.

Bright colors are popular for kids' birthday shoots to bring energy to the scenario. They work well with birthday decorations, and vibrant tones highlight action like a child doing a cake smash or their favorite dance move. Brights work well as events decor unless they clash with the scene, in which case a neutral, even white, is better.

Product photographers use a range of colors to highlight, contrast with or complement the product they are photographing. Creative shots are done with bright or atypical colors that express the desired mood.

Social media bloggers also choose colors to fit the scenes they are setting for their videos and images.
How to Select the Perfect Paper Background for Social Media Bloggers
Eye-catching appeal is essential to getting clicks for social media posts. Social media bloggers choose a color and style backdrop that fits their online persona, complements their brand or products, and connects well with their target audience. For example, a travel blogger might choose a sunny and bright backdrop. Bloggers who produce professional and informative posts or showcase products select neutral backgrounds or those that match their product’s appearance. Social media bloggers in the creative arts select and often artistically modify backgrounds that fit their artistic vibe.

Other Considerations When Choosing Backdrop Paper
For most shoots, you’ll want a non-reflective paper backdrop material. This background paper has a matte finish which absorbs light instead of scattering it. This allows you to control lighting without concern for reflection and glare, which create havoc during a photoshoot.
In general, darker colors absorb more light than lighter colors. You’ll have to work with different lighting setups and paper backdrop colors to find combinations that work the best.
Choosing the right backdrop paper includes consideration of the size of your studio. In a small space, the largest background size you can accommodate might be medium, or around 7 feet wide. Keep in mind that narrow and medium width backdrop paper rolls are also easier to transport and store.
How to Set up a Seamless Paper Backdrop
Setting up seamless paper takes a little practice but can be mastered in a short period of time. Here are the accessories and steps used to set up a seamless paper backdrop or background.
Let’s start with accessories. Gaffer tape is a cloth tape with strong adhesive that holds up to heavy use. It is used to secure a backdrop to the floor to prevent the paper ends from curling up. One or more clamps with a strong spring prevent the backdrop paper from unrolling.
Another device used to secure the paper to the backdrop stand is a paper stop. It is a plastic device inserted into the core of the paper roll. Its purpose is to prevent unwanted unrolling or unraveling of the roll.
Here is a step-by-step tutorial for setting up paper background:
- Step 1:The first step is to insert the paper stop into the seamless paper backdrop core. This is optional but advised.

- Step 2:The roll of paper is then installed on the top bar of the backdrop stand.
- Step 3: The backdrop paper is pulled off the roll, down to the floor and then out another 3-10 feet depending on the needs for the shoot.

- Step 4: The front edge of the backdrop paper is secured to the floor with the gaffer tape from the bottom or at least where it won’t be in the shot. Sandbags or other weights are also commonly used.

- Step 5 (Optional as needed): Any excess paper can be rolled back up, if necessary, so that the infinity curve or sweep where the paper meets the floor is created.
There are several backdrop stand types to use.
- Standard backdrop stands:These are versatile and portable, combining sturdy legs with tripod “feet” and one crossbar. The core of the backdrop paper fits onto the crossbar of the stand when it is detached from the side post and then reattached. Note that a paper stop can be inserted into the paper tube for easier use.
- Height and width adjustable stands: Adjustable background stands with multiple crossbars can hold one roll of seamless backdrop paper on each bar. These paper background stands provide the most versatility and value.
- Wall-mounted stands: These stands mount to the wall with two brackets that hold one or more crossbars. Their advantage is that they save floor space, though it may require skill to mount to the wall and to use effectively. Each horizontal crossbar is removed from the wall mount, and a roll of paper, with or without a paper stop, is installed on it – in other words, the crossbar is inserted through the core.
- C-stands: These commercial-grade photography studio stands have one vertical post or column, usually with a heavy-duty tripod foot, sometimes on wheels. C stands have one horizontal boom arm that can be adjusted up and down plus side to side on either side of the vertical column. Sandbags are often used for counter weights at the base or on the boom on the opposite side of the column from a light. A backdrop can be attached to the arm, and they’re sturdy enough to support lighting, diffusers and reflectors too. Two C-stands can be used, with their arms extending toward one another, to support heavy backdrops.
How to Hang a Paper Backdrop Without a Stand
It is still possible to use backdrop paper if you don’t have a backdrop stand. The best approach is to cut enough of the paper off the roll to achieve your purposes.
Secure the top of the paper to the wall with gaffer’s tape. Taping the paper from behind hides the tape. Also secure the bottom of the paper to the floor for two reasons. First, it keeps the edges from lifting up. Secondly, the paper can be secured at a point that creates the infinity sweep or curve that eliminates the horizon line.
Essential Tips for Using a Seamless Paper Backdrop
Here are practical tips for successfully using a seamless paper backdrop.
- Choose a versatile backdrop stand. A versatile background stand is one that is adjustable in both height and width. Most versatile backdrop stands are light enough to be portable too.
- Take precautions when unrolling and securing the paper. Consider a paper stop. A stop fitted into the core of the paper roll prevents unwanted unraveling and potential damage to the paper. Unroll the paper carefully, since some fragile backdrop paper can easily tear or wrinkle. Once the paper is in place, open and insert one side of a clamp into the core with the other side on the outside of the paper. This will prevent the paper from unrolling.
- Create an infinity curve. The advantages of eliminating horizon lines include a smooth, continuous background for shots that capture the full body of the subject. Tape is typically used to secure the lower end of the paper to the floor. Weights, if they’re not in the shot, can also be used.
- Place clear Plexiglas over the paper on the floor. This practice protects the paper and gives the floor a shine that can enhance some photoshoots.
- Understand lighting on the backdrop. This takes experimentation. The goal is to light the background to prevent causing shadows. It will help to keep subjects several feet away from the backdrop paper to reduce shadows.
- Control light and color. Lighting that is too strong can wash out the color of light papers. Darker colors may need additional light to maintain their rich hues. Also, because bright papers can cast color onto subjects, adjust white balance in your camera settings or in post-production.
- Recycle used backdrop paper.

How to Cut a Paper Backdrop
Cutting backdrop paper is easy, but the right tools must be used and care must be taken to prevent tearing and wasting paper.
- Gather your accessories. Sharp scissors or a utility knife with a sharp blade are the best tools to use. A tape measure and light pencil allow you to measure and mark the exact amount you need.
- Unroll, secure and measure the paper: Roll out the paper on a hard, flat surface, not on carpet. Taping the paper to the floor with masking tape is an option for holding the paper in place as you cut. Asking someone to help with this task is another option. Measure and mark both sides of the paper at the cutting point. You can also use the points and something straight to create a cut line.
- Cut the paper. Using the scissors or utility knife, cut across the paper from one mark to the other.
- Cut off damaged paper. When it is time to replace the paper, you can use your cutting tool to cut the paper off the roll while the roll is hanging on the backdrop stand.
How to Store Seamless Paper Backdrops
Taking care to properly store seamless paper not in use will keep it in good condition.
- Roll the paper tightly. Loose paper on a roll is susceptible to tearing and creasing.
- Seal each end or mouth.Most background paper ships with plastic caps on the ends of the roll for protection. Keep them! And put them back on before storage to prevent the roll ends from getting tattered.
- Wrap plastic around the roll. If the roll is going to be in storage for more than a short period of time, consider wrapping it in its original packaging or similar plastic wrap for added protection from dust and moisture.
- Dustproofing can also be done with scraps from old, unusable rolls of backdrop paper.
- Label your rolls. On the label, include the exact color such as the product number. And also include an approximate estimate of how much of the paper is left in terms of feet. For example, “Kate White D103859 Backdrop Paper. Approx. 15’.”
- Store paper rolls vertically. This will prevent sagging or flattening of the roll which inevitably produces creasing and other damage.
- Consider a roll stand. This keeps the rolls off of the ground and keeps them in a very upright position.
- Choose a dry, dark storage place. A dry environment prevents the paper from absorbing humidity. And storing the paper out of direct light, especially sunlight, prevents fading.

Post-processing Tips for Paper Backdrop Issues
Here are the most common post-processing repairs related to using paper backdrops.
- Remove creases and other minor imperfections: The Photoshop Clone Stamp tool or a similar tool in other editing software can be used to replace creases and wrinkles with perfect paper. A Healing Brush is another good tool for cleaning up minor blemishes, smudges, and other imperfections in the background. The Patch tool is also an option for correcting problems like footprints.
- Balance the backdrop color: Use post-processing software Levels and Curves adjustments to even out the tone where needed. If the paper appears darker on one side of the image, the Gradient tool can be used to balance the brightness of the backdrop color tones.

- Enrich the Color:Use Hue Saturation Adjustment and Selective Color tools to perfect the color tones while not affecting the subjects.
- Improve lighting issues:Exposure problems are addressed with Dodge and Burn tools to lighten or darken specific areas for optimal balance without impacting the appearance of the subjects.
- Fix white balance:Whites and grays pick up color casts from nearby objects. White balance tools bring those colors back to a pleasing neutral. A more advanced option is to use adjustment layers to tweak color temperature and white balance.
- Make the backdrop wider or longer:Occasionally, the subjects extend beyond the backdrop paper. Use either the Clone tool or Photoshop’s Content-Aware Fill feature or similar to extend the background as needed.