Pumpkin Head Photoshoot: Preparation, DIY Tutorial & 16 Creative Photo ideas

Halloween is a universal favorite time of the year. It's that spooky and creative moment when you get to think outside the box and show your coolest and most sinister side.
If you are still deciding what to do for your unique Halloween photoshoot this year, hear us out! You can opt for a unique pumpkin head photoshoot that will make your spooky and creative dreams come true. It will add a handful of fun and creativity to the process too!
But how do I even start organizing a pumpkin head photoshoot? - You might think.
Don’t worry! In this article, we’ve got you covered. We will share anything you need to know to create the coolest, spookiest, and most original pumpkin head photoshoot. We will include the pumpkin preparation and DIY. And, of course, our most creative pumpkin head pose ideas!
So if you’re the kind of person who’s not afraid to think big - pun intended - keep on reading and let’s get sinisterly creative together!
Preparation Before Your Pumpkin Head Photoshoot
Every professional photoshoot starts with an organized and well-thought-out preparation. Halloween photoshoots too, especially the ones that include a pumpkin head!
So here are the main points to keep in mind when preparing your unique festive shooting.
1. How do I even get a pumpkin head?
Yes, I know. This might be your number one question! So let me remove your doubts.
There are two options you can choose from.
The easiest one is to buy one online or in any Halloween-themed shop. However, this will not be the best choice as it will result in more fake and less authentic.
The second choice is to DIY one by buying a fresh carving pumpkin and customizing it to your unique will and desires. This option will allow you to get creative and artisanal with your shooting.
If this sounds more like you, you can keep on reading. We will explain how to DIY your fresh pumpkin head in paragraph two!
2. Ok, I have the pumpkin head. Now what? Halloween Backdrops!
Whether you’re team buying at the shop or team DIY, after you choose your best option you can move forward to the next important step: the background.
The setting is an essential part of the photoshoot as it is what gives a unique vibe, especially when capturing festive photos.
The perfect scenarios for Halloween photoshoots are haunted forests, cemeteries at midnight, and ghostly houses! Not so easy to find unless you choose to rely on Halloween-themed backdrops!
Backdrops will make your job so much easier, especially when wanting to shoot in front of scenarios that will otherwise be hard to find or re-create.
They also effortlessly enhance the photo’s quality and professionalism by adding creativity and value.

Some backdrop ideas include:
- Halloween Retro Spooky Backdrop
- Halloween Pumpkin Forest Light
- Halloween Magic Castle House
- Halloween Spooky Night Forest
- Halloween Pumpkin Gate Night
And more! You can check the wide range of Halloween-themed backdrops here to choose which one mostly relates to your taste and desire.
3. Pumpkinhead and backdrop checked. What can I add?
After the unique pumpkinhead and personalized backdrop what comes? You can opt to add some props and accessories to make the setting even more customized.
Some ideas include adding more real pumpkins to fill the scene or fake spiderwebs all over the space to add spookiness. If you’d like the setting to feel more poetically dark, you can add several lit wax candles.
The extra props and accessories are yours to choose from according to what you aim to showcase. Get creative, think outside the box. Don’t be afraid to play big!
4. Now, let's not forget to choose the proper location!
Now, it’s time to find the perfect location!
Especially if choosing to shoot in front of a Halloween-themed backdrop, shooting in a studio would be the preferred location.
A professional studio will make it easier for you to measure the space and pick the perfect backdrop size for the shooting. It will also be a more intimate space where you can feel safer and freer to play with your pumpkin head.
If a studio is not an option, you can opt for outdoor spots - some ideas include forests, gardens, flower fields, autumn leaves paths, pumpkin patches. Anywhere that will add up spookiness to the photo vibe and will feel intimate and safe for you to model your pumpkin head.
DIY Pumpkin For Pumpkin Head Photoshoot
The Pumpkinhead DIY might be the funniest part of your creative photoshoot! You don’t have to worry. We’ll share each step in detail, so you don’t miss out on anything. We care for you to create the best pumpkin head ever!
1. What’s your head size?
Of course, the carved pumpkin needs to fit someone’s head. So, measurements are key! The first step involves precise measuring of the model’s head - both vertically and the circumference. After getting your precise measurements, add an extra twelve inches to the estimation. This will ensure there is space to breathe and feel comfortable and that it’s not too tight.

2. Time to go pumpkin shopping!
Once you get the perfect calculation it’s time to go find a pumpkin patch and go shopping! You can pick the pumpkin according to the size measured. If you are undecided, make sure you pick the lightest one (thank me later!).

3. Here’s where the (messy) fun begins
Once you have your perfect size pumpkin it’s time to carve it out! Start by making a circle at the bottom of it. Make sure you keep the top intact as it will be aesthetically beautiful. Proceed with cutting the bottom with a sharp knife. Cut a circle big enough for you to enter it. Then go ahead with scooping out all the inside materials to make space for you to be in it!

Image from Istock
4. Choose the back and front
Now, make sure you properly observe your pumpkin and carefully choose which side will be the front and which will be the back. Once you pick, you can proceed with cutting away a portion of the back region inside it. Then, you can comfortably accommodate your head once in it.

Image from Pexels
5. Time to try and check it out
Before moving forward, try it out and see if it fits well. See if the circular opening is comfortable enough for your neck. Check if the inside back region feels good. Since the inside will be damp, you can use a paper towel, a plastic bag, or a shower cap to try it out!

6. Good things take time, don’t rush it!
If, once you try it, the cutting feels too small do not force it, as you may damage the pumpkin. You can gently remove it and proceed with cutting a larger circumference. Ask someone to assist you during the process. Remember, it is better to cut it smaller than bigger because you can always fix it afterward!
7. Safety first
Once you ensured you carved out the perfect size for your neck and back head, you can move forward with some safety precautions. Let the pumpkin dry for a couple of hours then proceed with covering the inside with some foam pads. This procedure will ensure your head will be safe and will feel comfortable throughout the shooting. The amount of foam depends on your comfort. Try it out and check it for yourself, you can always add more if you feel the need to.

8. Now make it expressive!
After you finalize the comfort, safety, and fitting it’s time to give a personality to your unique pumpkin! You can trace the eyes, nose, and mouth by asking for some help and pointing out the eyes while your head is inside the pumpkin. Make sure you trace the desired face with a pencil before carving it out! Start with small holes in the eyes to ensure you can properly see through them. Then, you can proceed with the rest! Have fun with it and make it as unique as possible.

Image from Pexels
9. Little spooky tricks
Once you have your final carved pumpkin you may want to hear this trick! For a spookier outcome, it is recommended not to showcase too much skin or eyes, as it will remove the Jack-o’-Lantern effect. For this outcome, you can consider wearing a thin, see-through black mask. This simple trick will add up to the overall spookiness and thrill.
10. Now you’re ready, little pumpkin star!
Now you’re finally ready to rock your homemade pumpkinhead! It was fun, wasn’t it? You can embrace your creativity by adding hats or any other spooky or desired element to your carved pumpkin. Make it as unique as you are!

You’re fully prepared! You have your unique pumpkinhead, your Halloween-themed backdrop, your props and elements, and your carefully selected location. Now what?
Now it’s time to choose your unique pose and make sure you get the perfect shot!
Pumpkin-head photoshoot for friends
Friends who carve pumpkins together, stay together! And friends who pose with a pumpkin head together, never leave each other. So let’s get some creative ideas for Halloween photoshoots for besties who want to wear their creative pumpkin!
1. The smoke pals
Whether you and your friend(s) are smokers or not, get creative with that ciggy! It will be such a fun pals’ idea to take a pipe or a cigarette and pretend the pumpkin heads are smoking it. It will be cool and aesthetic to play with the smoke too!

2. The crazy pumpkin squad
For this pose, have the most fun! When shooting a group of three or more friends, get all dressed up eccentric, gothic, and creative. Then, pose uniquely from a distance striking the coolest pose! A bonus tip is to include some orange or black smoke bombs to add to the vibe.

3. The drunk pumpkins
Not all pumpkin head photoshoots need to be taken in front of a spooky, Halloween-themed backdrop. A creative idea is to shoot home with the pumpkin heads on while sipping on some wine bottles and playing cards or a table game.

4. The floating heads
For a spookier outcome, get all dressed up in black outfits and shoot in a dark environment, at night time. This shot will naturally enhance the vibrancy of the orange pumpkin heads, making it look as if they were floating heads in the dark! Have fun with the spookiness of this shot!

Image from Pexels
Pumpkin-head photoshoot for Couples
If you’re less of friends group photoshoots and more of romantic captures, you might want to read the next paragraph! Lovers’ shootings with a Halloween theme are so cool! Here are some pose ideas for pumpkin-head photoshoots for couples.
5. Jack-o’-Lantern’s couple dance
Get your romantic spirit on, with a sinister touch with this Halloween pose idea. Wear your uniquely carved pumpkin heads and get together with your lover in a spooky dance. It will feel like a haunted, timeless, love shot.

Image from Pexels
6. A pumpkin head proposal
Want to mix cuteness with creepiness? Then boy, get on the knee! And, re-create a proposing scene (unless you really want to propose with a pumpkin head-on, then go ahead, you have all my respect!).

Image from Pexels
7. Corpse bride, but a pumpkin version
If you’re beyond proposal and want to step to the next stage then this is for you! Think “Corpse Bride” but make it a pumpkin version! Dress up as a bride and groom but with your creative pumpkin heads on. An additional tip is to paint your pumpkins in white and black!

Image from Pexels
8. Hearts and pumpkins
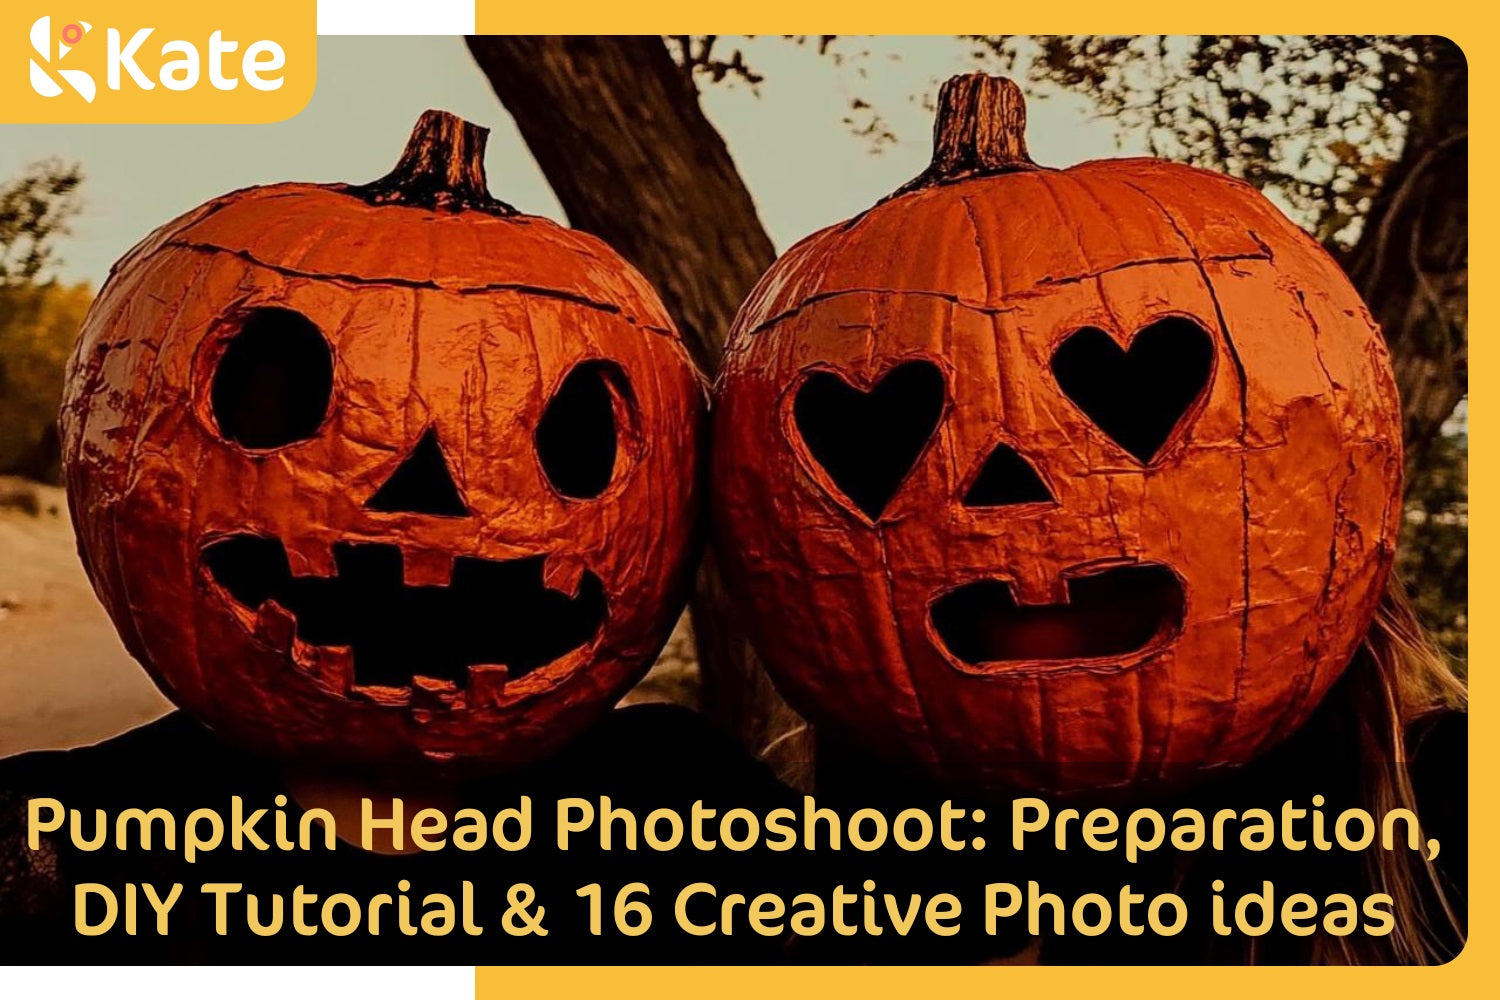
If you’re less of the spookiness and more of the cuteness hear me out! Consider carving your pumpkin head’s expression in less of a sinister way and more of a “teenager in love” way. An idea is to carve heart-shaped eyes and a cute smile. Get cute and creative with the shot. The pumpkin expression will speak for itself.

Image from Pexels
Pumpkin-head photoshoot for Family
Can you think of a better family memory than carving pumpkins together and posing with them? I can’t. If you want to experience this festive joy with your family, here are some pose ideas.
9. Don’t mess with us
Here’s a simple, yet effective idea. First of all, try carving out your unique pumpkin heads with different expressions. Then, pose in a crescent line while holding hands and facing the camera. It will give a “Don’t mess with us!” vibe.

Image from Pexels
10. The uncanny fam
If you want to play big, get the main couple to stand in the foreground while holding hands. The kid(s) can stand in the middle of their arms in the background. Get all dressed in dark, elegant outfits. Proceed with shooting the family creepiness.

11. Boooo!
On the contrary, you could have the couple in the background and the kid(s) in the foreground. Suggest the kid(s) strike a monster-looking pose. A pose that feels as if they are shouting “Boooo!” directly to the camera.

12. The armed gang
If the collective target is not to look innocent, find some weapons! Get one unique weapon each - hammer, gun, riffle, knife. Then, proceed to shoot with your unique, angry-looking pumpkin heads on while carrying your favorite weapon. Here’s your most spine-chilling pumpkin head pose!

Pumpkin-head photoshoot for Kids
Of course, we cannot forget the little ones when mentioning pumpkin head photoshoots! Kids might be the ones who have the most fun doing this. So let’s dive into some creative pumpkin-head photoshoots for kids.
13. The sinister little guy/girl
Do your little ones want to feel terrifying? Have them wear a spooky outfit. Then make sure they stand with their sinisterly carved pumpkin head in a half-hidden location. Suggest they hold a scary weapon or accessory too.

Image from Pexels
14. I'm coming for you!
Another idea involves one where one or more kids stand with their arms facing the camera, almost trying to grab it. It will sinisterly whisper “I’m coming for you. Beware!”

Image from Pexels
15. Pumpkin-themed boy/girl
Here’s an idea for less of a creepy and more of a cute Halloween-themed outcome. Have your kid(s) wearing their pumpkin head while also holding onto another pumpkin. Ideally, have them grip onto a pumpkin balloon too. The best locations for this shot are either a pumpkin patch or an autumn-looking forest.

Image from Istock
16. Headless pumpkin
If your kids have a dark sense of humor, they’d love this pose idea. Have one of them wear the pumpkin head, while holding onto another pumpkin head. The other kid can pose lying down, with his/her shirt covering his face. This shot will end up looking like a sinister joke. One, where a kid is left headless. A funnily scary scene!

You brave soul! You made it until the end, congrats!
We hope you’re already measuring your head while reading these words. It’s our wish you’re already getting ready for your unique pumpkin head photoshoot!


 Valentine's Day2025🌹


