Remove Dark Circles under Eyes: Photoshop | Lightroom Tutorial

A photographer can struggle with dark eye results even after capturing the best photo. This requires some work in the post-editing process through software like Adobe Photoshop and Lightroom software. Additionally, the tools have improved over time and now include automated features for convenient editing.
If you're wondering how to eliminate them, the following write-up is a step-by-step tutorial on using the two tools. Read on for additional tips to improve your photos.
- 1. Photoshop Tutorial
- Bonus: Photoshop Blood Vessels Removal Tutorial
- 2. Lightroom Tutorial
- Bonus Lightroom Blood Vessel Removal Tutorial
- Conclusion
1. Photoshop Tutorial
Photoshop is arguably the most professional photo editing tool. This is a credit to a long time in the industry. It's convenient if you're a beginner boasting various easy-to-use tools and regular feature updates.
Here is how to use Photoshop to remove dark eyes:
Step 1: Update and Launch the Software
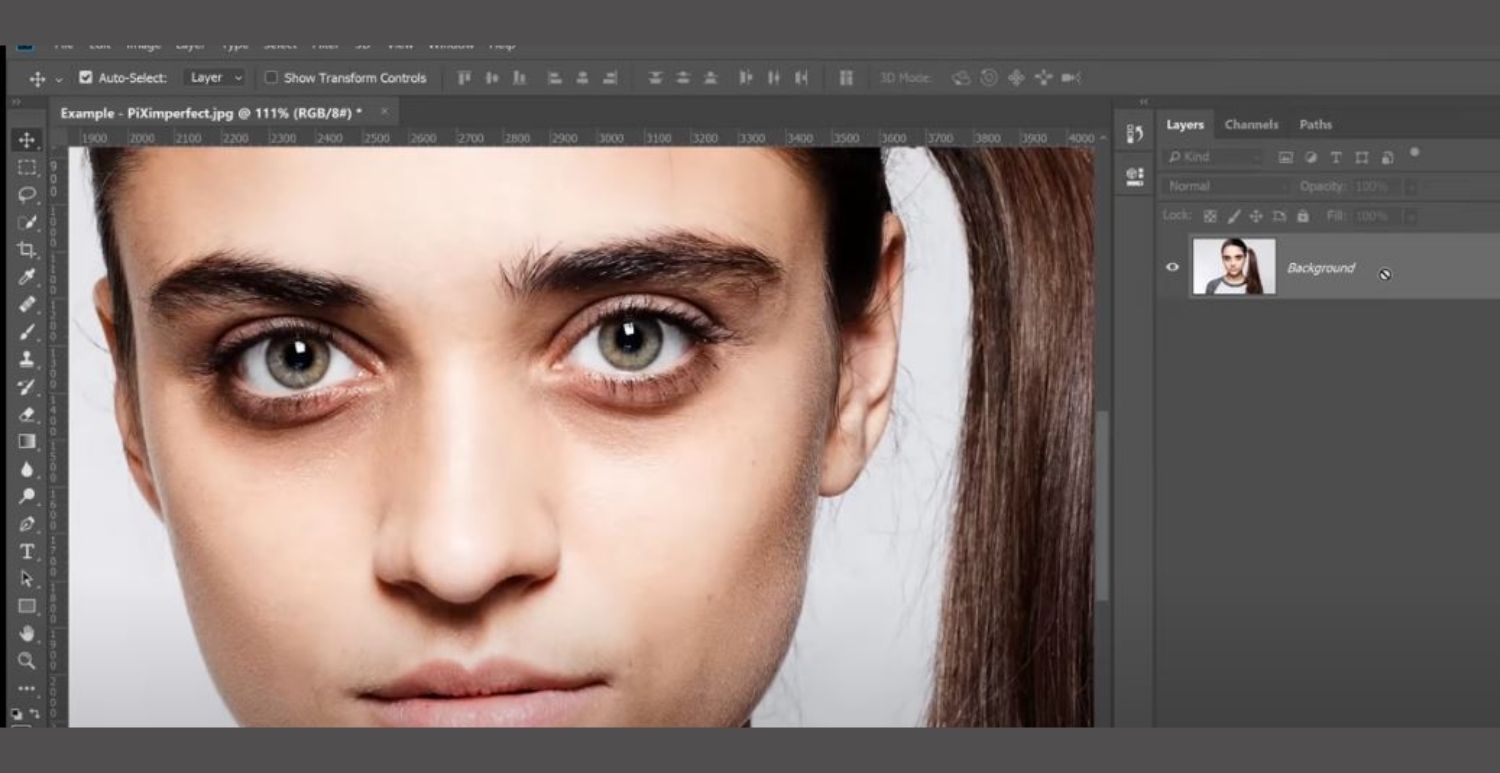
Ensure you have the latest updates before launching the Photoshop app. After that, follow the following step
- Launch the app/software
- Upload your photo by selecting "File" > "Open"
- Create a copy of the picture by pressing Ctrl+J/ Cmd+J,
- Create another empty layer between the original and the copy.
Step 2: Zoom in or Create a 'High Pass' Layer on the Dark Circle
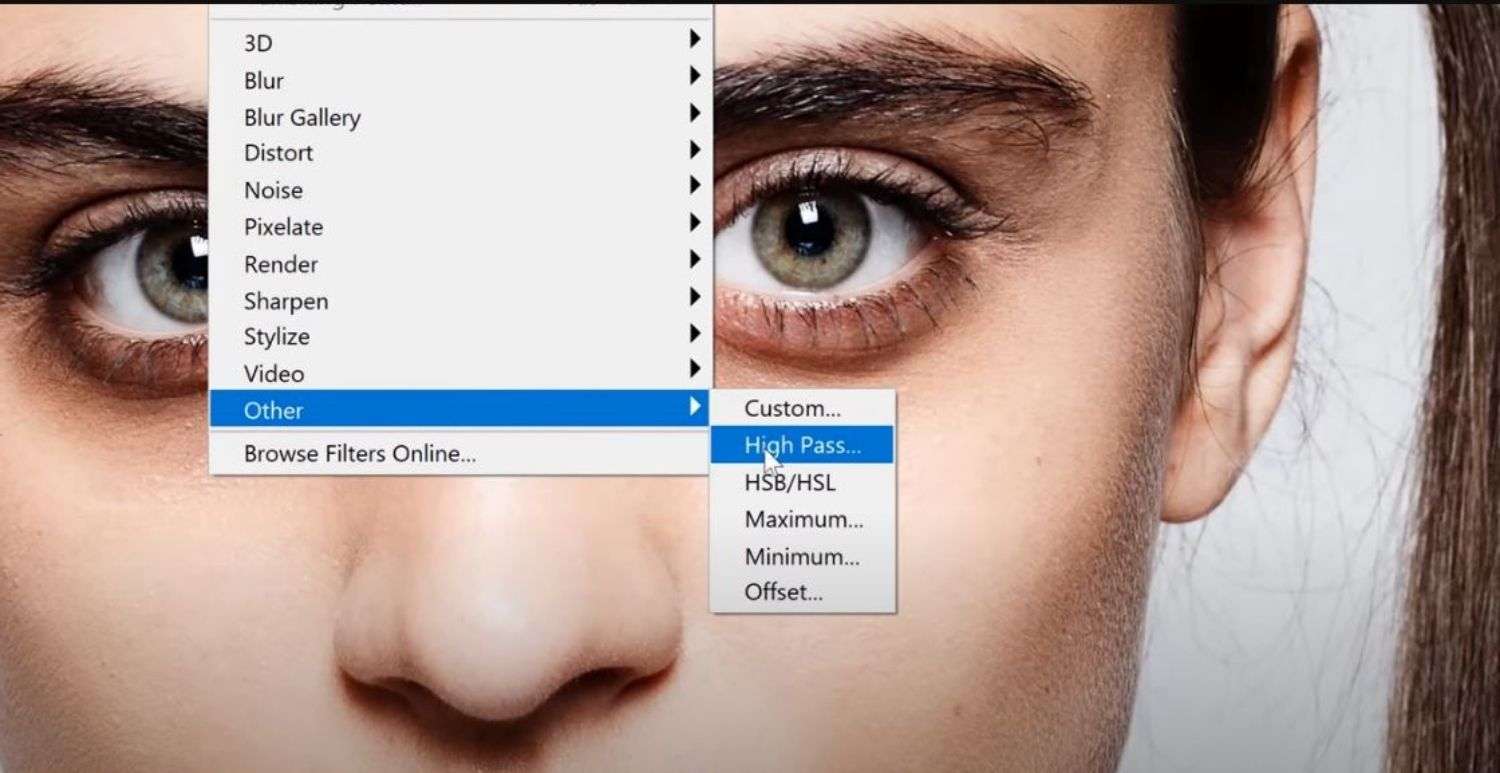
You can isolate the dark eye circles by zooming in or creating filters. Here's what the two methods involve:
- Zoom in: By holding down the "Ctrl" key and swiping your mouse wheel over the impacted portion of your photo. You can also use the zoom tool from the toolbar and view your desired region.
- Creating a filter layer: To do this, toggle back to the filter section, scroll down to others, and use the 'High pass' setting. Your photo will be covered in a layer whose opacity you can control to see the circled section of your model.
Step 3: Apply the Spot Healing Brush Tool
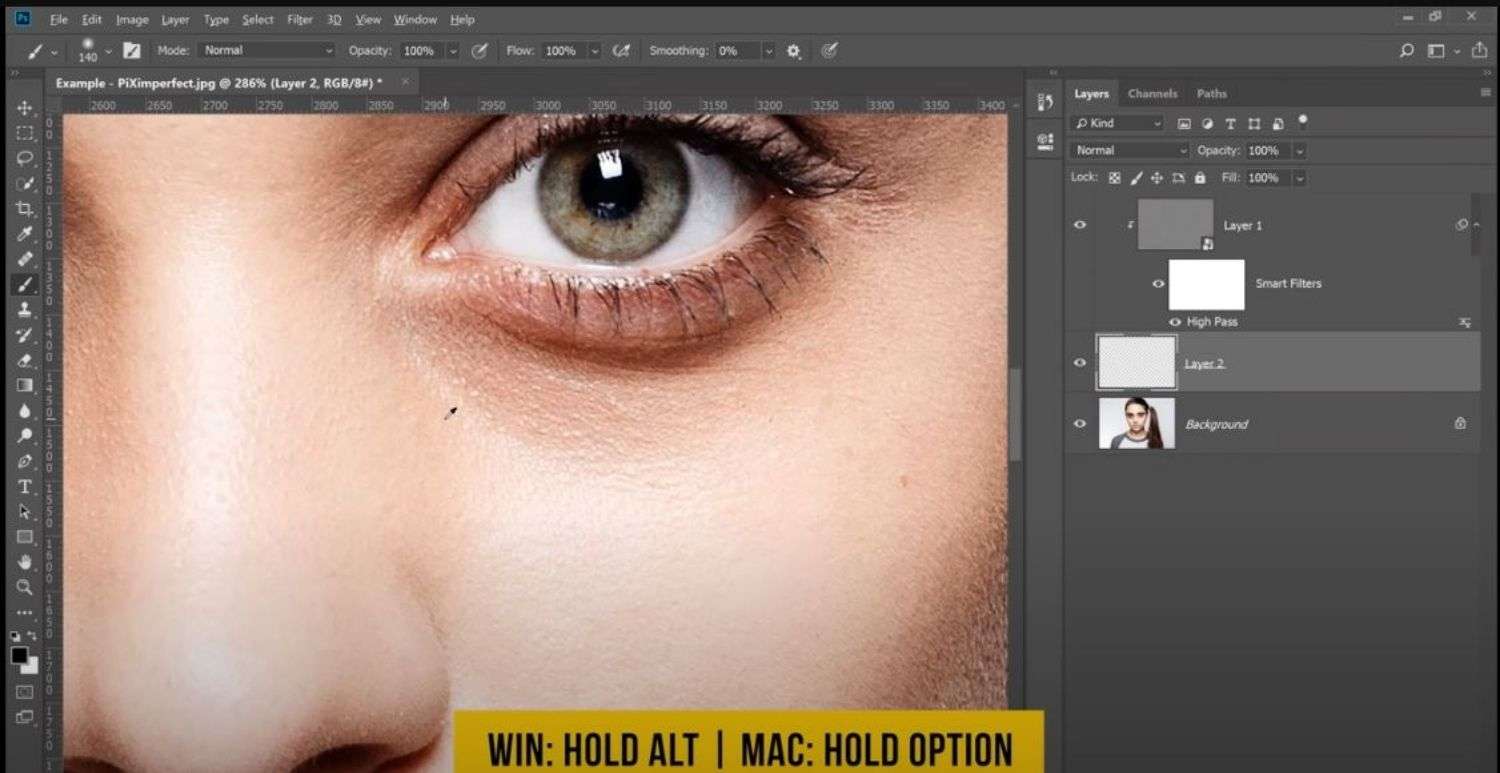
You can now start working on the blemishes, and the healing brush tool is excellent. It looks like a bandaid and helps to remove blemishes and imperfections like dark circles.
Changing the brush size helps in working in various dark blemish sizes. Therefore, no worries if the affected areas are larger than expected. Do this by using the bracket keys on your keyboard or adjusting the toolbar slider.
After making the necessary tests and adjustments, click and drag the Spot Healing Brush tool over the dark circle. The tool will automatically blend the set pixels around your chosen area with the surrounding pixels to produce a seamless, natural-looking result.
Step 4: Repeat the ‘Step 3’ for Refined Results
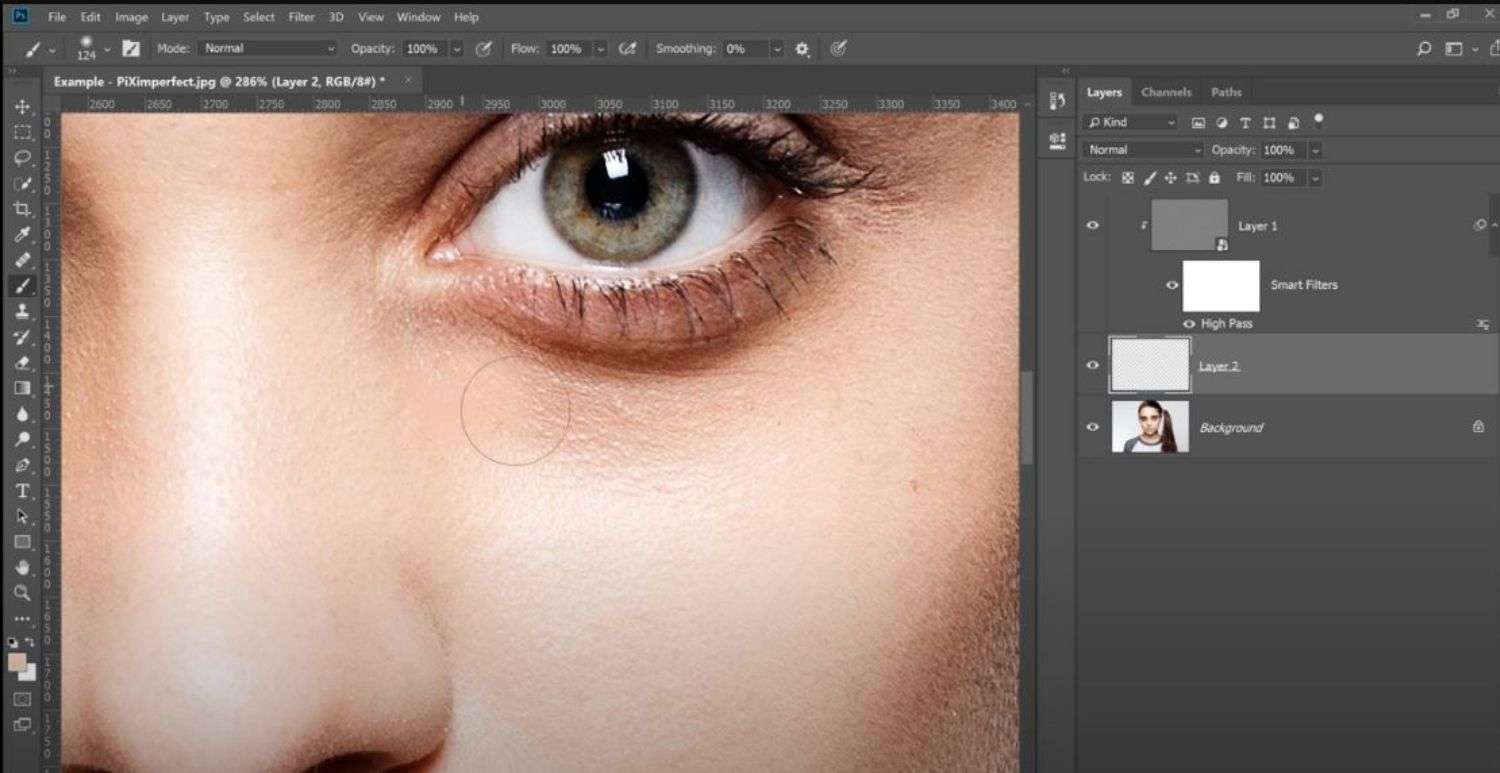
To get crisp results, continue adjusting your brush size depending on the dark area. However, you can get unnatural if you overdo it.
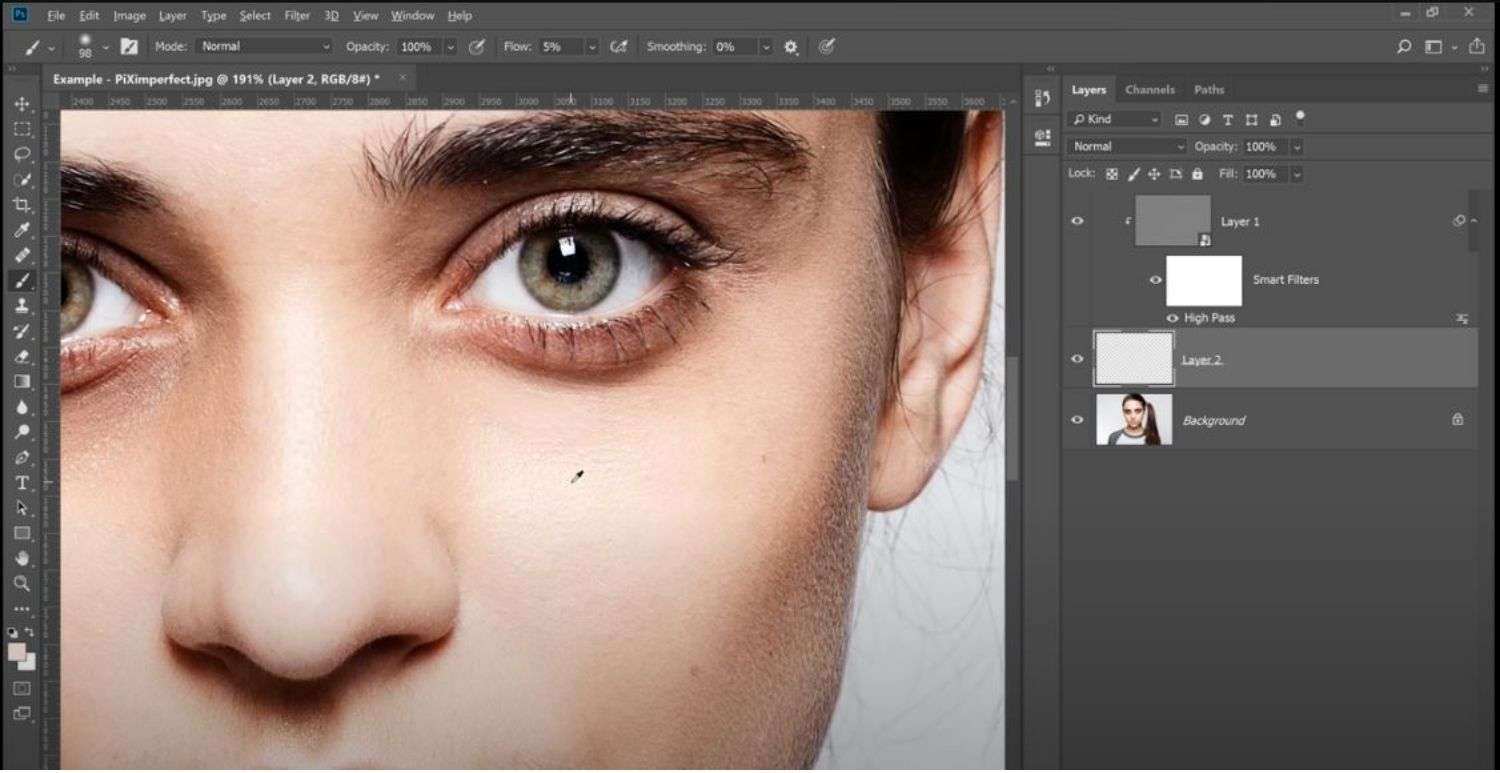
Image credit: youtube.com
Step 5: Save Your Edited Photo
You can save your image if you’re happy with the finished results, or explore other editing options with the Photoshop tool.
Bonus: Photoshop Blood Vessels Removal Tutorial
Are you wondering how to remove blood vessels? Worry less as we've got you covered on what most photo editors will consider a complex task. The following processes show how it's relatively easy if you understand your software dynamics.
After importing your photo to the app, you can use the following steps:
1. Photoshop Tutorial
- Step 1: Create another layer by copying the image using Ctrl+J, then right-click on Layer 1 to use adjustment colors.
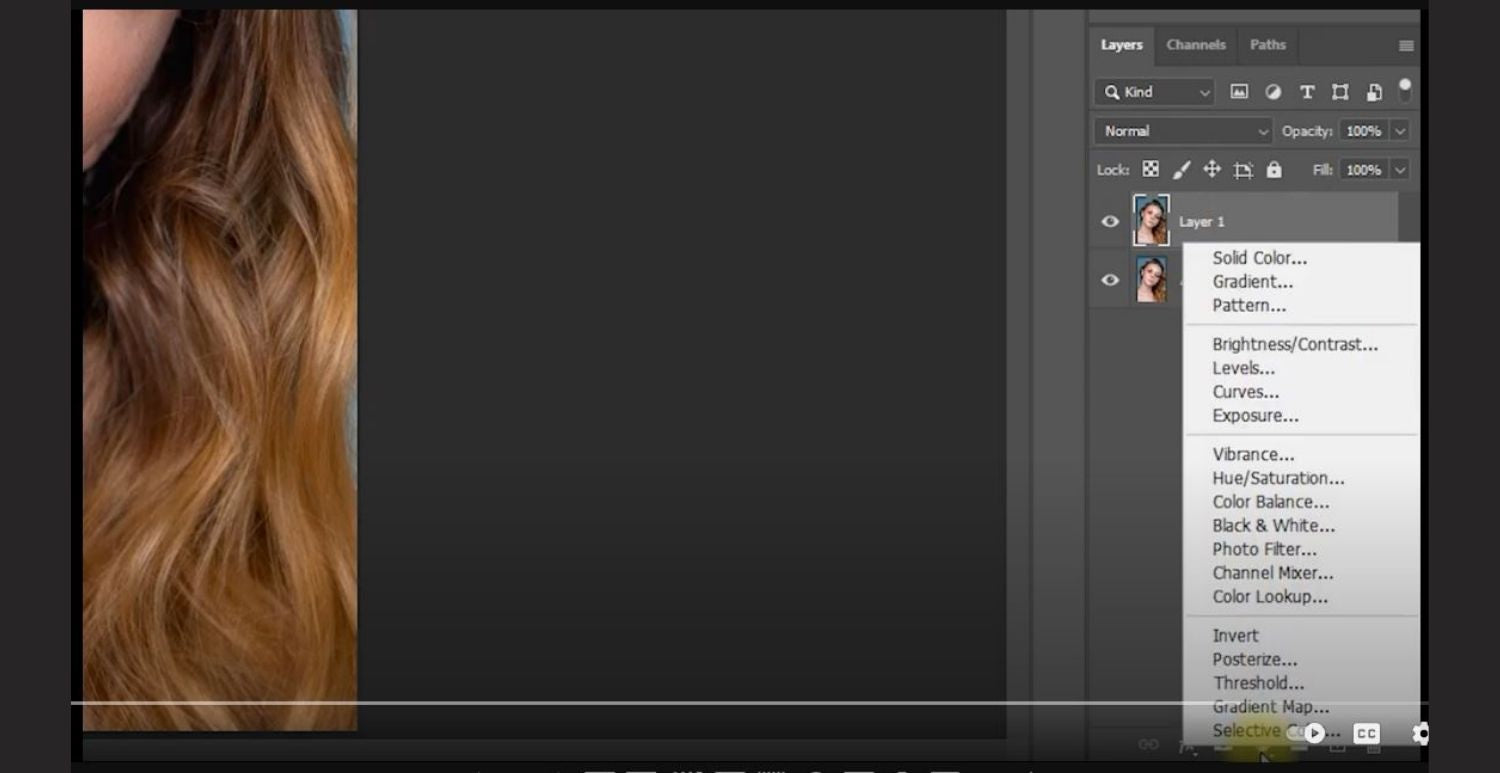
- Step 2: You can start by using the red color, reducing its opacity until the red-eye effect starts fading. Do the same with the preceding colors; blue and Magenta then click the color mask and Ctrl ‘I’ to invert it.
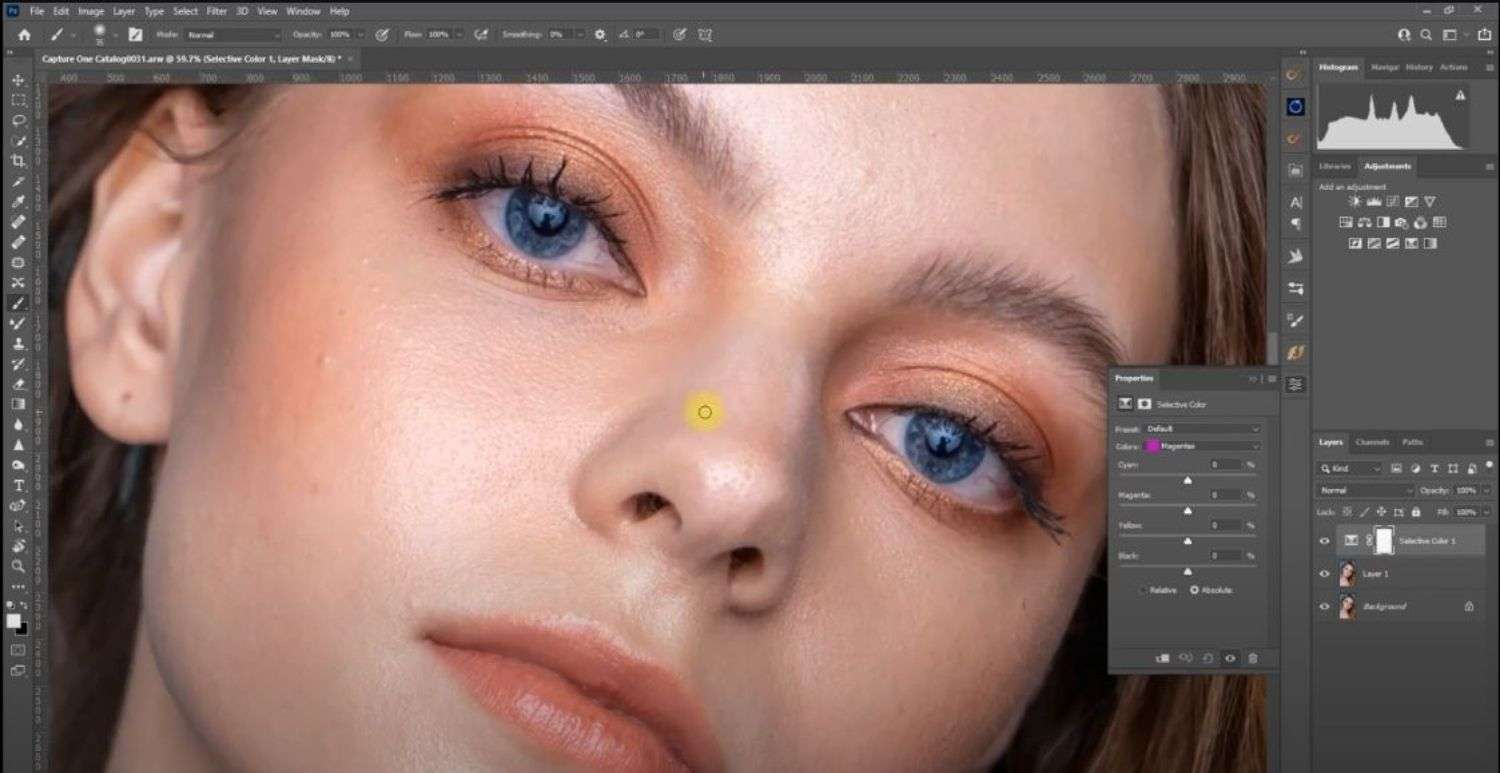
- Step 3: Paint the red parts of the eyes using a white brush tool, which you can access on the left-hand side of the screen. You can compare the results by clicking the different layers on the right.
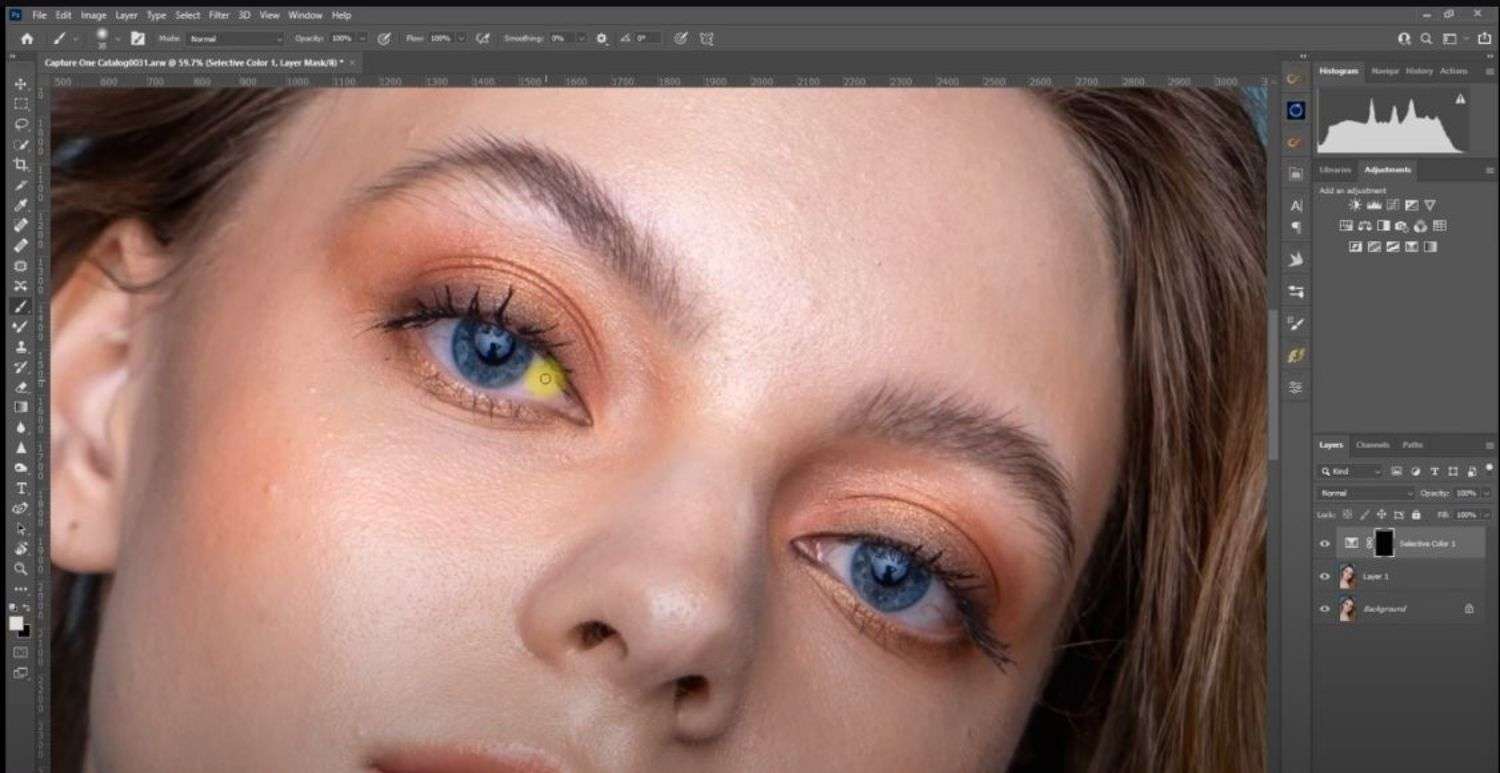
- Step 4: On the bottom layer, use the clone stamp tool (lighten mode) by pressing 'Alt' to sample a white section before brushing and covering the vessel.
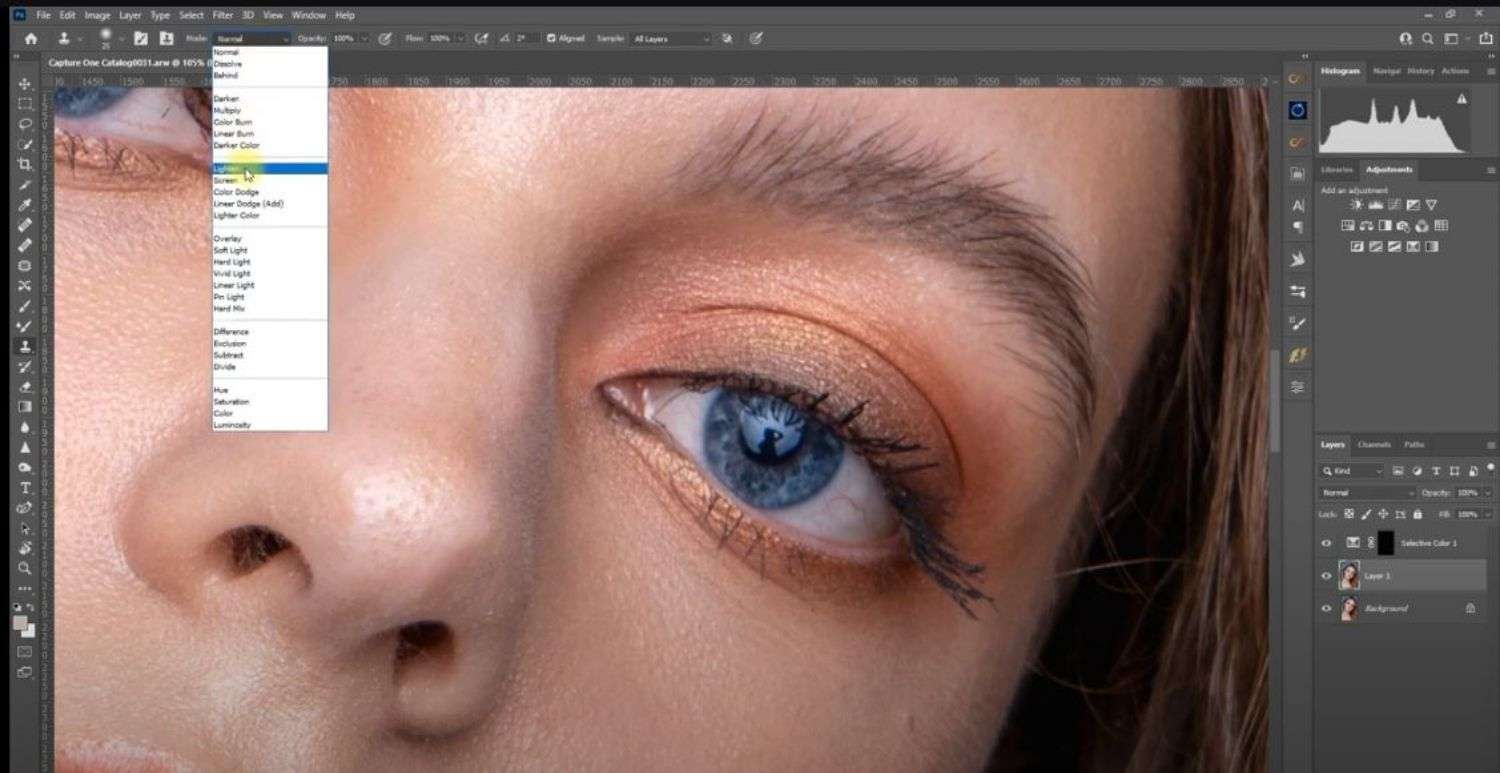
Image credit: youtube.com
2. Lightroom Tutorial
Alternatively, use Adobe Lightroom, a convenient and easy-to-use app through its access to reliable tools when removing dark eyes.
Here's how to remove dark circles under the eyes with Lightroom.
Step 1: Upload Your Photo
To open/upload your photo, go to the Library module and select the photo you want to work on. Follow by clicking on the Develop module to access the Lightroom editing tools.
Step 2: Zoom In on the Dark Circles
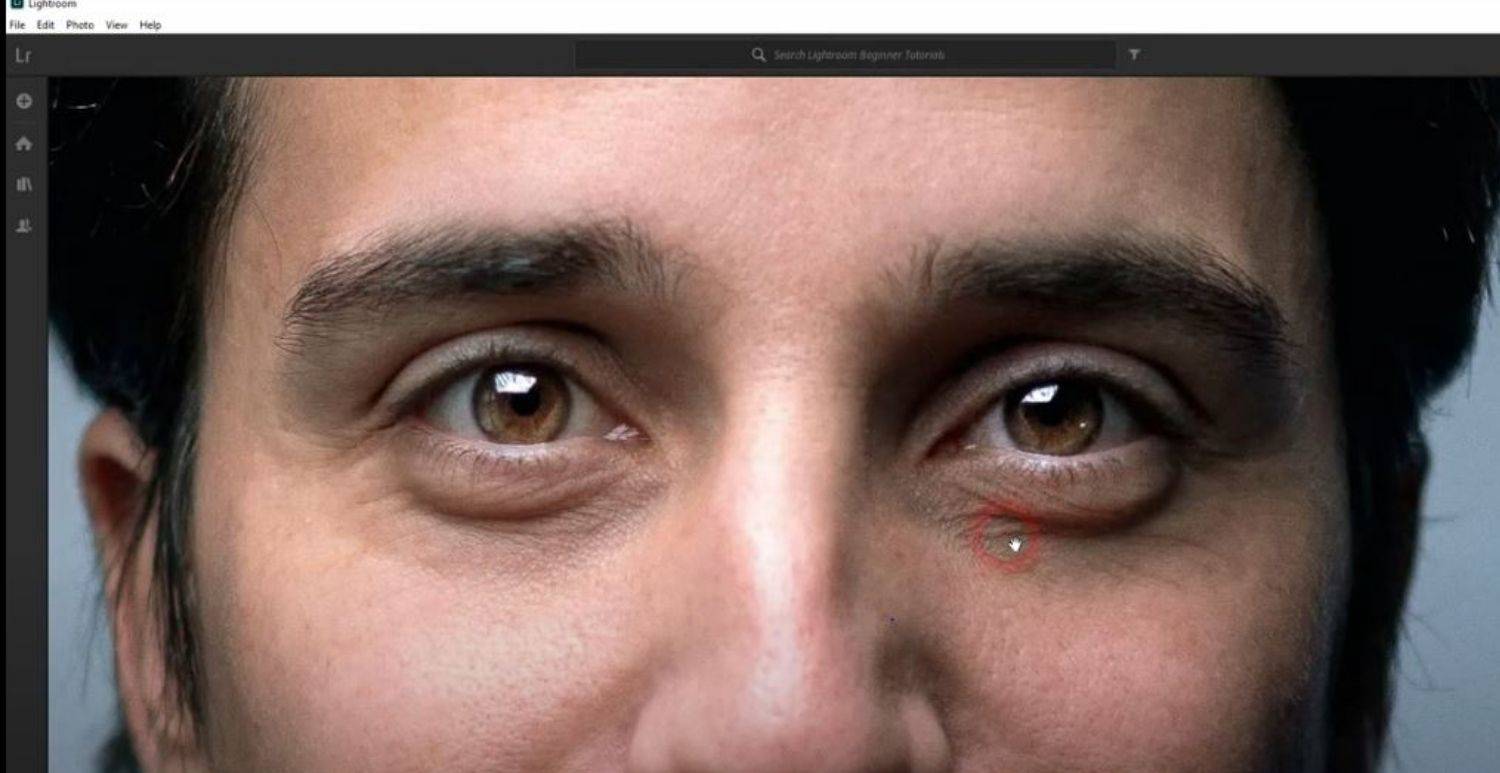
Zooming in on the bags under your eyes helps you get accurate editing results. There are two ways to do this on the software and they include:
- Use the zoom slider at the bottom of the screen.
- Pressing the "Z" key and clicking on the area you want to zoom in on.
Step 3: Apply the Adjustment Brush Tool
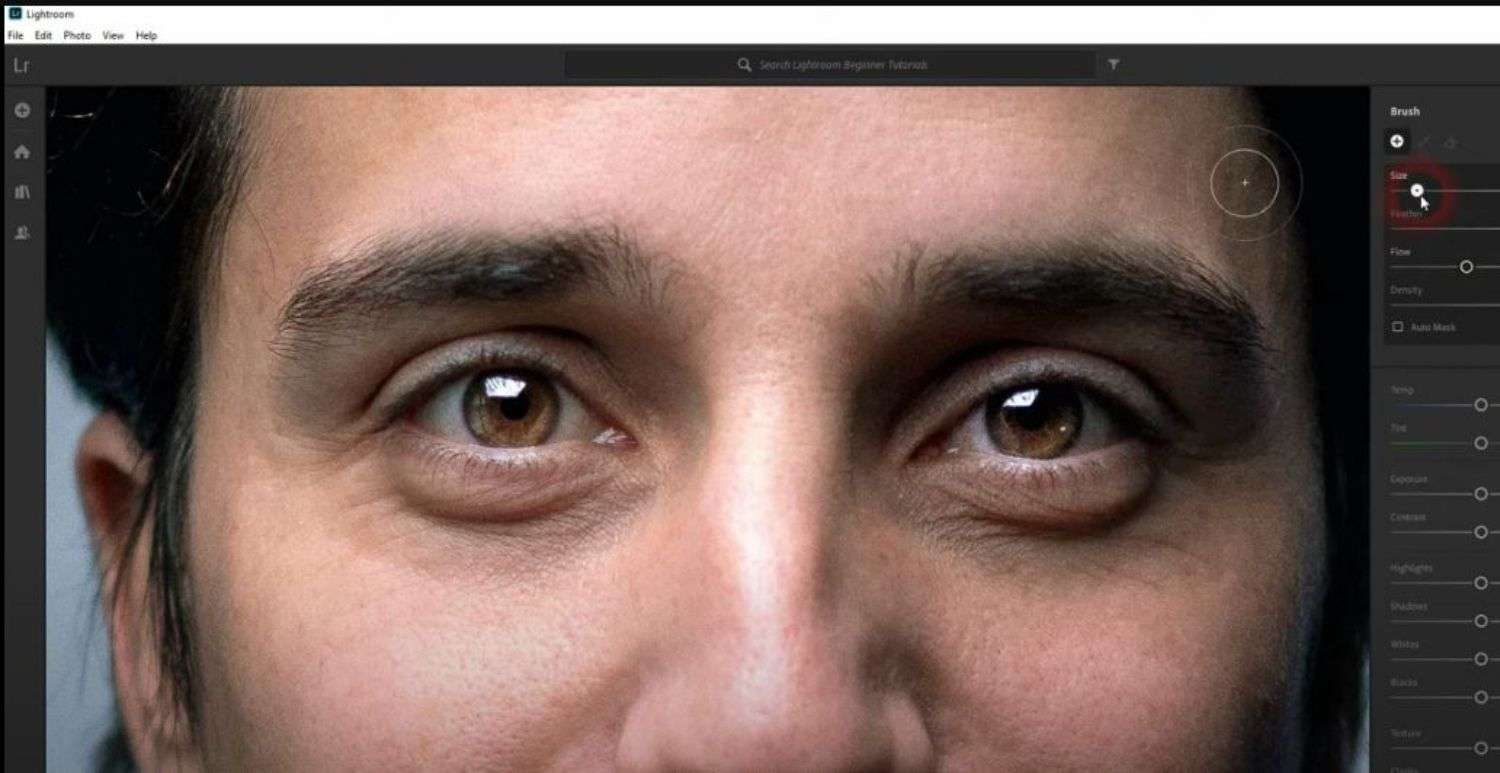
Navigate the layout's right side to get the Adjustment Brush tool from the toolbar. It's the brush icon with a plus sign next to it.
Change the Brush Sizes
To get a smooth blend, adjust the brush size to your preference between the edited and unedited sections. Also, You can also adjust display settings like exposure, and contrast to brighten up the section and reduce the appearance of dark circles.
Step 4: Cover/Paint Over the Dark Circles
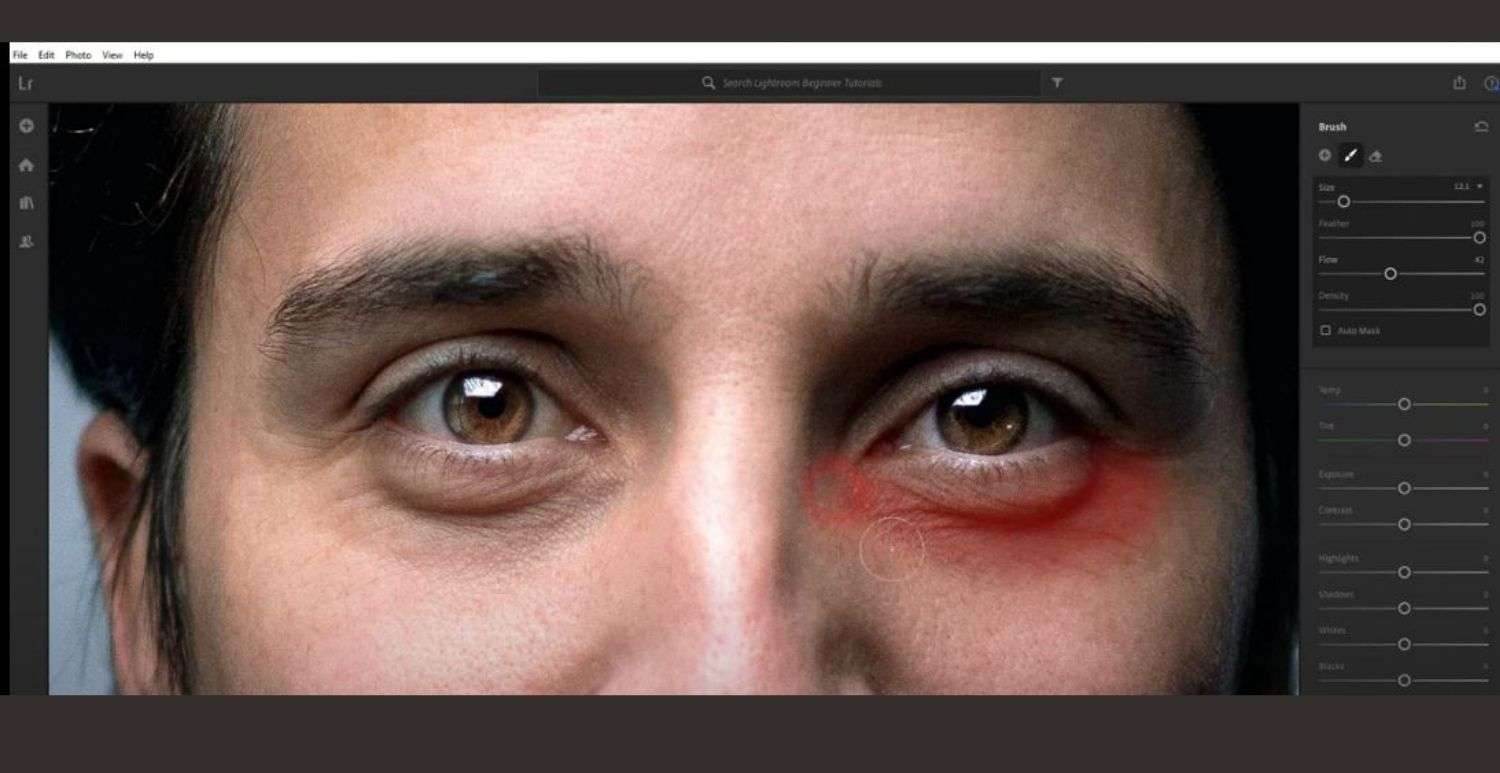
If you've already achieved the ideal adjustment settings on your brush, start painting over the bags under the eyes. However, you can switch the brush size to correct different sections of the subject's face.
Step 5: Polish Your Photo and Save the Edits
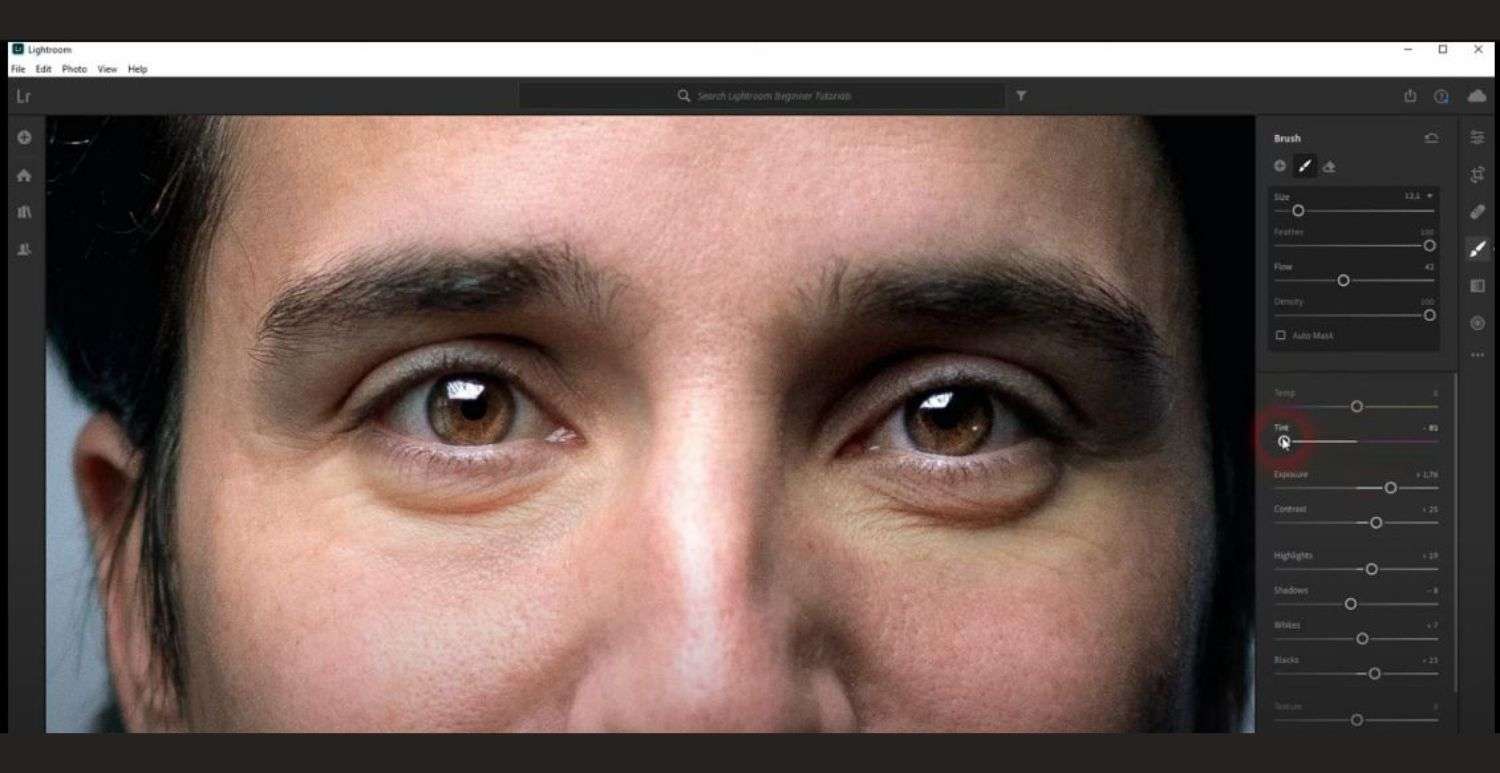
Image credit: youtube.com
The bags under the eyes may appear overexposed or saturated compared to the rest of the image. Try finetuning your edits by adjusting the sliders in the right-hand panel, where, for instance, you could lower the exposure, saturation, or other settings.
Follow by saving your changes by clicking on the "Done" button at the bottom right-hand corner of the screen. Lightroom will then apply the edits to your photo and save it as a new file.
Bonus Lightroom Blood Vessel Removal Tutorial
Below is a process of removing blood vessels from a subject's eye using Lightroom:
- Step 1: Zoom in to see the affected sections.
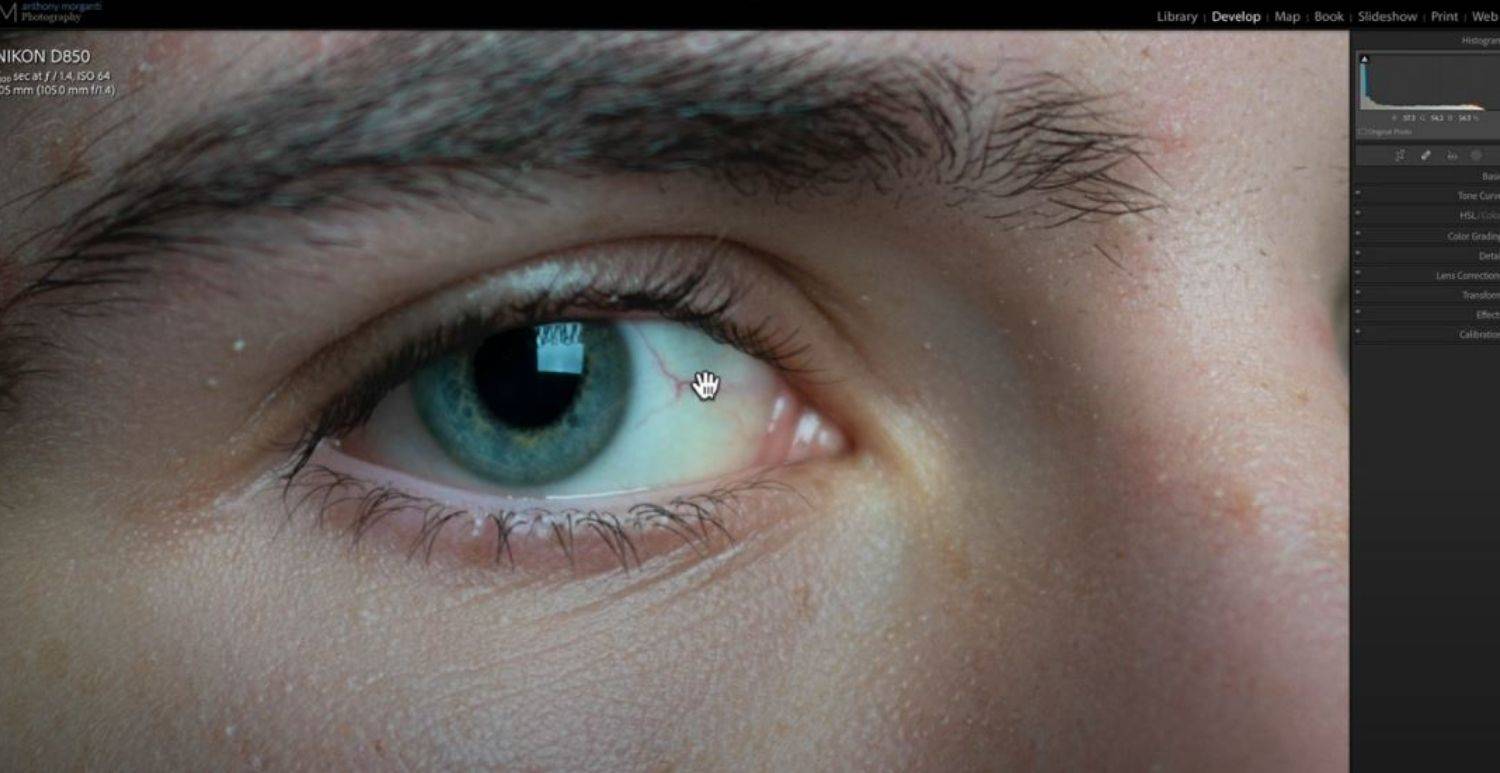
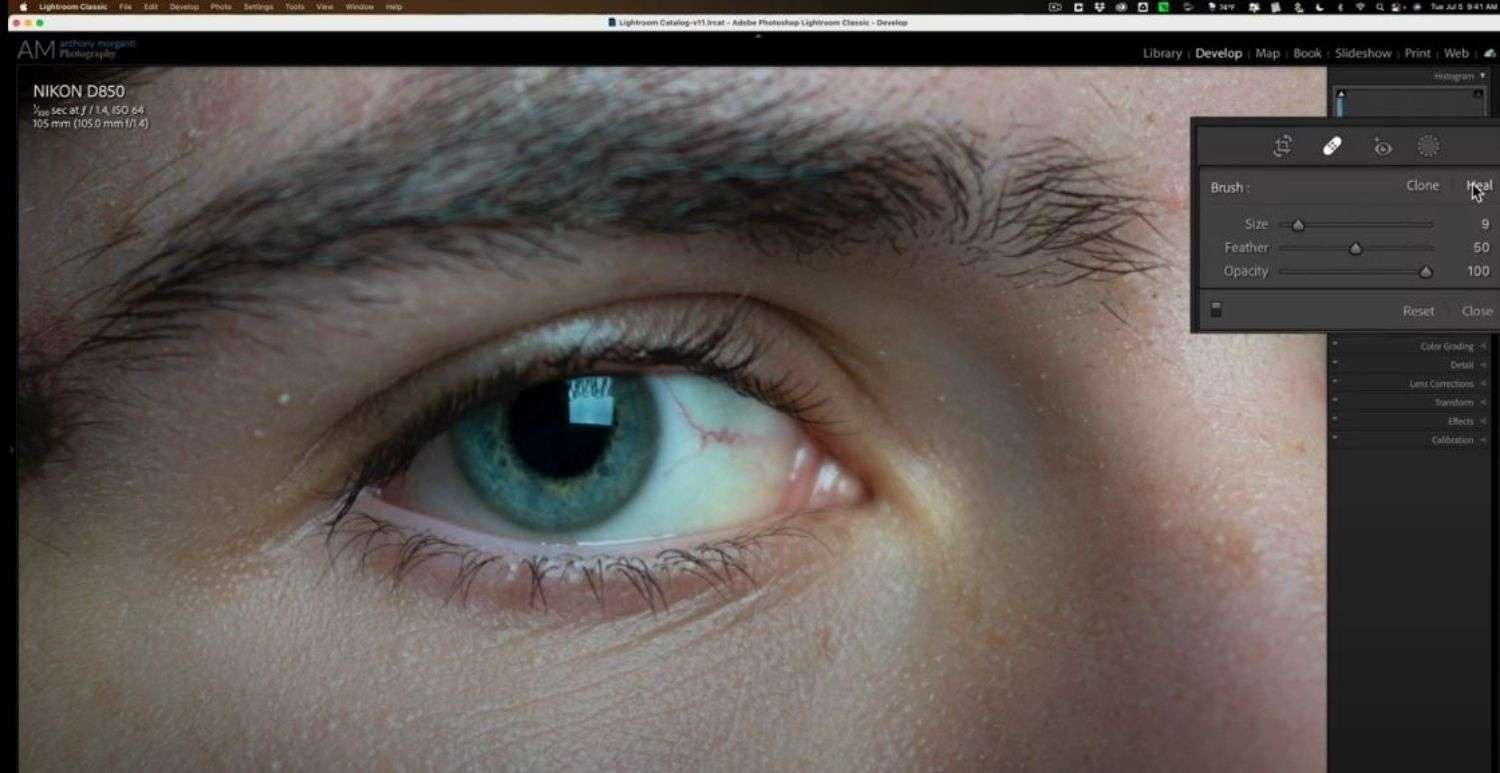
- Step 2: Access the brush tool on the right side of the layout, and make several settings on the brush size, feather, and opacity.
- Step 3: Draw a line with the brush over the vessel when zoomed in and press 'h' to hide the initial overlay. Although not necessary, you can remove all the vessels to maintain the authenticity of your photo.
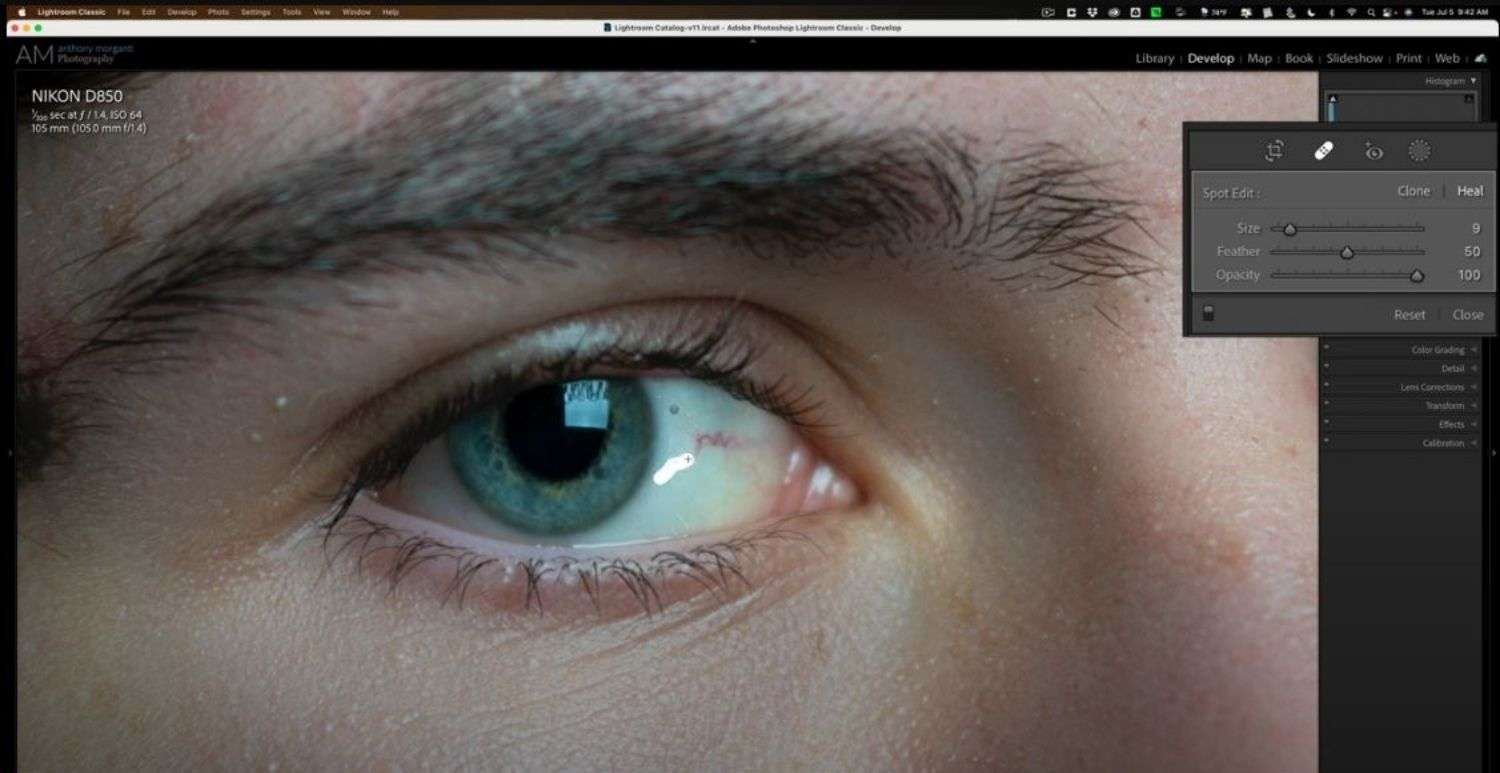
- Step 4: Zoom out to see your results.
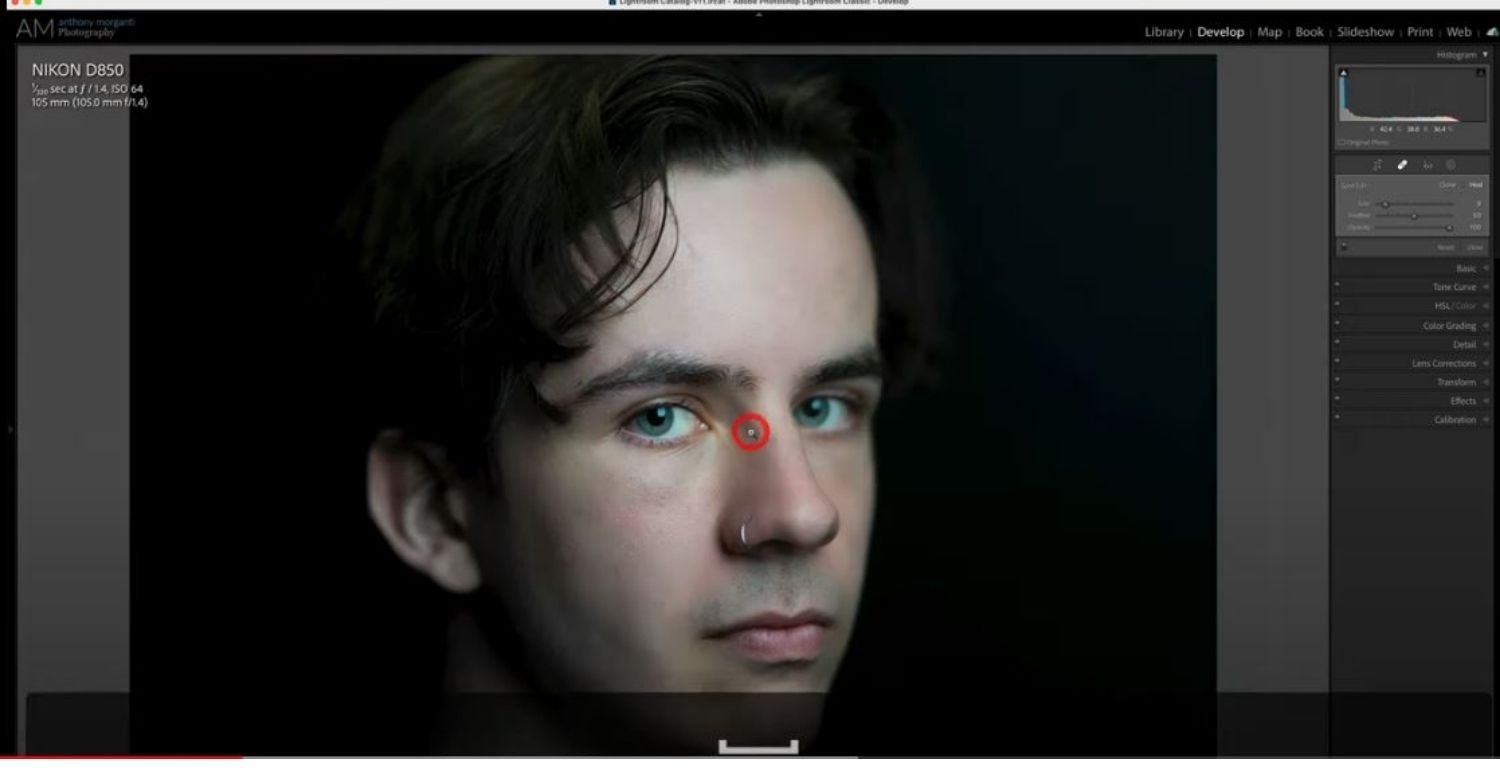
Image credit: youtube.com
Conclusion
Therefore using the Adobe tools is a convenient way to eliminate dark circle eyes on a subject. The article highlights different ways you can observe and edit the sections. Also discussed are bonus methods for eye blood vessel removal. The latter assists in attaining all round results regarding edits on a subject's eyes. Depending on your chosen software, you can explore additional ways and tools and compare the results.




 Boho
Boho


